Pistachio burl with inlays of stone. The base is Burmese Blackwood.

 Oh that reminds me, the intended purpose of this piece. I envision it the house ons dreams and desires, future goals. I then thought that I would go out to, Like marshals hobby store and look to see if I could find a candle to place into, within, flush to the top. Oh, the top, I made it flat, to show as much of the beauty of the burl as possible. If I haven,y said it enough, I am in awe of this piece, the mixture of earth elements in a swirling galaxy around mystical planet toids. Or a dry river bed meandering through mountainous landscapes of turquoise, pyrite, fools gold, crystal dust, and hint of prior attempts of copper and more. This piece, while for the conscious self, your inner mind will always be trigued, by finding something new, not noticed before.....
I assure you that I will post the finished product in a couple of weeks, if not sooner. no need to rush the process
 |
| Close to completion |
This piece has been most difficult. let me tell you some of the difficulties.
The first was at the beginning, when I first mounted it on the lathe. It was so dry, "how dry was it" you say. It was so dry, as it was turning, and I was attempting to chisel away. Instead of streams of chips, flying through the air, all I got was dust, choking me in every way. I put it aside until, I thought I would add a mixer of shellac and alcohol. This worked well. I then had the shape I was after.
I decided to added some color and minerals in a resin base. Well here is problem #2, the resin never harden, the hardener was out dated. Who knew. What a mess. Problem #3, how to remove sticky mess.
 |
| With out inlays |
Sticky mess, I tried soaking in alcohol, (oh I need more alcohol), That really helped, but as you can imagine, the resin filled with copper dust, malachite, turquoise, and much more. So I continued to turn and pick out as much as I cold. I then had the bright idea to melt solder, then I went out and tried pewter, after purchasing a melting pot from Bass Pro Shops. Of course this too came with challenges. Oh I almost forgot, after trying tirelessly to remove the sappy resin, the wood got really hard. So hard that my carbide wasn't cutting it, at all. I then soaked the vessel in water for two plus days.
Well now I can get started with finishing the exterior with CA glue and minerals. I sealed the outside as I was completing, with Shellac and alcohol mixture.
Well we are on our way now, to the hollowing, the interior was damp but wet, to my surprise. I use a remake of the easy tool, with circular carbide cutter. This one worked best.
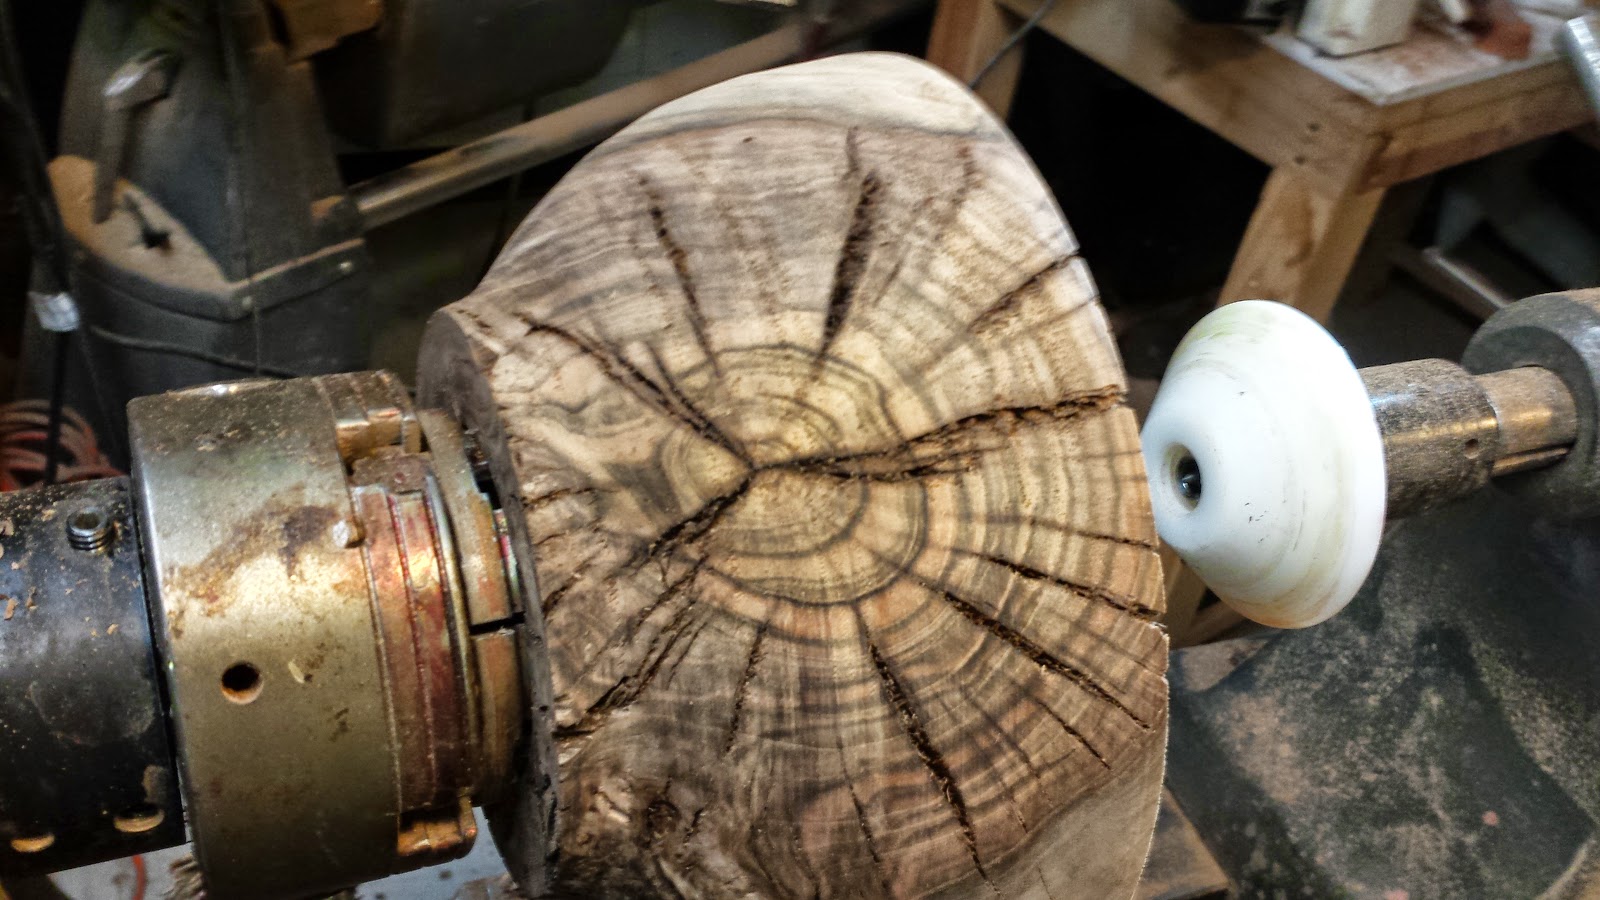
The first picture show the piece mounted on a small chuck through top hole, after it was hollowed. I the want to add some lift, so I found a 6x6 of Burmese Blackwood, (love this wood), After mounting the burmese blackwood, I then hollowed the base, So if one wanted to, they could turn the bowl upside down and have a smaller bowl for candy or and keys.
 |
| With out inlays, and befor hollowing. |
Oh that reminds me, the intended purpose of this piece. I envision it the house ons dreams and desires, future goals. I then thought that I would go out to, Like marshals hobby store and look to see if I could find a candle to place into, within, flush to the top. Oh, the top, I made it flat, to show as much of the beauty of the burl as possible. If I haven,y said it enough, I am in awe of this piece, the mixture of earth elements in a swirling galaxy around mystical planet toids. Or a dry river bed meandering through mountainous landscapes of turquoise, pyrite, fools gold, crystal dust, and hint of prior attempts of copper and more. This piece, while for the conscious self, your inner mind will always be trigued, by finding something new, not noticed before..... I assure you that I will post the finished product in a couple of weeks, if not sooner. no need to rush the process
Comments
Post a Comment